こんにちはイチケンです。
ラズパイ+RealSenseでAI物体検出と距離計測をやろうと思っています。そこで必要となるTensorFlowをインストールして行きたいと思います。TensorFlowといえばライブラリ依存関係が強すぎてちょっとバージョン違うとうまく行かなかったりで面倒ですよね。
RealSense公式サンプルコードのバージョン2.3.0をインストールするため、いくつかの記事を参考に試したのですがどれも一発ではうまくいかず。試行錯誤した結果、私の環境で一発でいける方法にたどり着きましたので紹介します。
この記事でわかること
ラズパイにTensorFlow 2.3.0とKeras 2.4.3をインストールしFashion-MNISTで学習と分類推定出力する最短方法がわかります。
- ラズパイにTensorFlow2.3.0とKeras 2.4.3をインストールする方法
- Fashion-MNISTを使った機械学習と推定出力
前提条件
まず前提条件となる私の環境です。
- Raspberry Pi 4 Model B 8GB
- Raspberry Pi OS 32bit (Linux arm 5.10.17-v7l+, Raspbian 8.3.0-6+rpi1)
- Visual Studio Code ver 1.55.2
- Python 3.7.3
- TensorFlow 2.3.0
- Keras 2.4.3
TensorFlowインストール
それではサクサクインストールしていきましょう。最終的にはこのサイトのやり方をアレンジすることで成功しています。
Installing Tensorflow 2.3.0 Raspberry Pi3+/4 (Debian Buster)アップデート
まずはラズパイまわりを最新版にアップデート。
sudo apt update
sudo apt upgrade
sudo apt clean
pipアップデートと依存ライブラリインストール
次にpipまわりをアップデートして依存関係にあるライブラリをインストールします。numpyは最新にすると「互換なし」のエラーが出るので1.19.0を指定するのがよいでしょう。
どの項目も数秒から1分程度です。
pip install --upgrade pip
pip3 install --upgrade setuptools
pip3 install numpu==1.19.0
sudo apt install -y libhdf5-dev libc-ares-dev libeigen3-dev gcc gfortran python-dev libgfortran5 libatlas3-base libatlas-base-dev libopenblas-dev libopenblas-base libblas-dev liblapack-dev cython libatlas-base-dev openmpi-bin libopenmpi-dev python3-dev
pip3 install keras_applications==1.0.8 --no-deps
pip3 install keras_preprocessing==1.1.0 --no-deps
pip3 install h5py==2.9.0
pip3 install pybind11
pip3 install -U --user six wheel mock
TensorFlowとKerasインストール
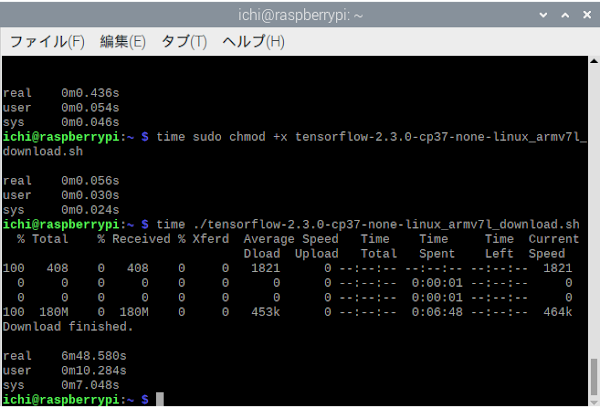
いよいよTensorFlowをいれていきます。所要時間は15分くらいです。
wget "https://raw.githubusercontent.com/PINTO0309/Tensorflow-bin/master/tensorflow-2.3.0-cp37-none-linux_armv7l_download.sh"
sudo chmod +x tensorflow-2.3.0-cp37-none-linux_armv7l_download.sh
./tensorflow-2.3.0-cp37-none-linux_armv7l_download.sh
別のバージョンをすでにインストールしている場合はアンインストールする
pip3 uninstall tensorflowTensorFlow 2.3.0をインストール。
pip3 install tensorflow-2.3.0-cp37-none-linux_armv7l.whlimportテスト
Python3でTensorFlowをimportしてみます。何もエラーが出なければインストール成功です。
python3
import tensorflow
tensorflow.__version__
exit()
'2.3.0'と表示されるはずです。では最後にKeras 2.4.3をインストールします。
pip3 install keras同様にimportしてみましょう。
python3
import keras
keras.__version__
exit()
問題なければバージョン'2.4.3'が表示されます。
Fashion-MNISTテスト
では機械学習界のHello worldことFashion-MNISTをテストしてみましょう。本家のサイトはこちら。
はじめてのニューラルネットワーク:分類問題の初歩表示にmatplotlibを使っているので、ない人はまずこれを入れましょう。
sudo apt install python3-matplotlibVSCode( インストール方法はこちら )などへ以下のコードをコピペして実行。数分で学習から結果出力まで終わります。解説は本家の日本語翻訳サイトにありますので割愛。従来のMNISTと比べて、Fashion-MNISTの方がやったった感がありますよね(笑)
import tensorflow as tf
import keras

# ヘルパーライブラリのインポート
import numpy as np
import matplotlib.pyplot as plt

print(f'TensorFlow: {tf.__version__}')
print(f'Keras: {keras.__version__}')

fashion_mnist = keras.datasets.fashion_mnist

(train_images, train_labels), (test_images, test_labels) = fashion_mnist.load_data()

class_names = ['T-shirt/top', 'Trouser', 'Pullover', 'Dress', 'Coat', 'Sandal', 'Shirt', 'Sneaker', 'Bag', 'Ankle boot']

# データチェック
train_images.shape
len(train_labels)
train_labels
test_images.shape
len(test_labels)

# 前処理
plt.figure()
plt.imshow(train_images[0])
plt.colorbar()
plt.grid(False)
plt.show()

train_images = train_images / 255.0
test_images = test_images / 255.0

# フォーマット確認
plt.figure(figsize=(10,10))
for i in range(25):
    plt.subplot(5,5,i+1)
    plt.xticks([])
    plt.yticks([])
    plt.grid(False)
    plt.imshow(train_images[i], cmap=plt.cm.binary)
    plt.xlabel(class_names[train_labels[i]])
plt.show()

# モデル構築
model = keras.Sequential([
    keras.layers.Flatten(input_shape=(28, 28)),
    keras.layers.Dense(128, activation='relu'),
    keras.layers.Dense(10, activation='softmax')
])

# モデルコンパイル
model.compile(optimizer='adam', loss='sparse_categorical_crossentropy',metrics=['accuracy'])

# 訓練
model.fit(train_images, train_labels, epochs=5)

# 評価
test_loss, test_acc = model.evaluate(test_images,  test_labels, verbose=2)
print('\nTest accuracy:', test_acc)


# 予測
predictions = model.predict(test_images)
predictions[0]
np.argmax(predictions[0])
test_labels[0]

def plot_image(i, predictions_array, true_label, img):
    predictions_array, true_label, img = predictions_array[i], true_label[i], img[i]
    plt.grid(False)
    plt.xticks([])
    plt.yticks([])

    plt.imshow(img, cmap=plt.cm.binary)

    predicted_label = np.argmax(predictions_array)
    if predicted_label == true_label:
        color = 'blue'
    else:
        color = 'red'

    plt.xlabel("{} {:2.0f}% ({})".format(class_names[predicted_label],
                                    100*np.max(predictions_array),
                                    class_names[true_label]),
                                    color=color)

def plot_value_array(i, predictions_array, true_label):
    predictions_array, true_label = predictions_array[i], true_label[i]
    plt.grid(False)
    plt.xticks([])
    plt.yticks([])
    thisplot = plt.bar(range(10), predictions_array, color="#777777")
    plt.ylim([0, 1])
    predicted_label = np.argmax(predictions_array)

    thisplot[predicted_label].set_color('red')
    thisplot[true_label].set_color('blue')

i = 0
plt.figure(figsize=(6,3))
plt.subplot(1,2,1)
plot_image(i, predictions, test_labels, test_images)
plt.subplot(1,2,2)
plot_value_array(i, predictions,  test_labels)
plt.show()

i = 12
plt.figure(figsize=(6,3))
plt.subplot(1,2,1)
plot_image(i, predictions, test_labels, test_images)
plt.subplot(1,2,2)
plot_value_array(i, predictions,  test_labels)
plt.show()


# X個のテスト画像、予測されたラベル、正解ラベルを表示します。
# 正しい予測は青で、間違った予測は赤で表示しています。
num_rows = 5
num_cols = 3
num_images = num_rows*num_cols
plt.figure(figsize=(2*2*num_cols, 2*num_rows))
for i in range(num_images):
    plt.subplot(num_rows, 2*num_cols, 2*i+1)
    plot_image(i, predictions, test_labels, test_images)
    plt.subplot(num_rows, 2*num_cols, 2*i+2)
    plot_value_array(i, predictions, test_labels)
plt.show()

# テスト用データセットから画像を1枚取り出す
img = test_images[0]

print(img.shape)

# 画像を1枚だけのバッチのメンバーにする
img = (np.expand_dims(img,0))

print(img.shape)

predictions_single = model.predict(img)

print(predictions_single)

plot_value_array(0, predictions_single, test_labels)
_ = plt.xticks(range(10), class_names, rotation=45)

np.argmax(predictions_single[0])

# MIT License
#
# Copyright (c) 2017 François Chollet
#
# Permission is hereby granted, free of charge, to any person obtaining a
# copy of this software and associated documentation files (the "Software"),
# to deal in the Software without restriction, including without limitation
# the rights to use, copy, modify, merge, publish, distribute, sublicense,
# and/or sell copies of the Software, and to permit persons to whom the
# Software is furnished to do so, subject to the following conditions:
#
# The above copyright notice and this permission notice shall be included in
# all copies or substantial portions of the Software.
#
# THE SOFTWARE IS PROVIDED "AS IS", WITHOUT WARRANTY OF ANY KIND, EXPRESS OR
# IMPLIED, INCLUDING BUT NOT LIMITED TO THE WARRANTIES OF MERCHANTABILITY,
# FITNESS FOR A PARTICULAR PURPOSE AND NONINFRINGEMENT. IN NO EVENT SHALL
# THE AUTHORS OR COPYRIGHT HOLDERS BE LIABLE FOR ANY CLAIM, DAMAGES OR OTHER
# LIABILITY, WHETHER IN AN ACTION OF CONTRACT, TORT OR OTHERWISE, ARISING
# FROM, OUT OF OR IN CONNECTION WITH THE SOFTWARE OR THE USE OR OTHER
# DEALINGS IN THE SOFTWARE.
実行すると最終的にこのような結果が得れます。
最後に
いかがでしたか?この記事が皆さんのお役に立てれば幸いです。
現場で使える生きたプログラミングスキルを身に着けるなら、現役エンジニアから学ぶのが最速ですね!


0 件のコメント:
コメントを投稿